Model textures and armatures – Week 2
- Christopher Cromb

- Oct 18, 2020
- 1 min read
Updated: Nov 25, 2021


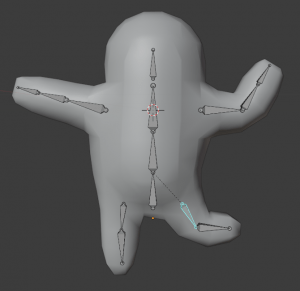
This week we made a Fallguy model using Metaballs which was a new and simpler way to make more organic shapes. We then converted it to a normal model so we could do texture painting for it. To get the different sections of the body all spread out to paint, lines across the model had to be selected where it would be cut apart. These could then be painted in the editor. By magnifying the face panel, it was easier to add detail. Next, to add movement to the model and prepare for animating next week we need a skeleton. The skeleton is called an armature in Blender and you can add and spread out bones where you need them throughout the model. Once they are all correctly scaled and spread out, the armature can be combined with the model. This allows moving the armature to also move the model for posing, as shown in the second image. This will be useful for the assignment as having moving characters and set pieces would improve the model.
The models I plan to make for my narrative would be stuffed toys that have a similar humanoid but condensed body to this model and I will use it for reference when planning mine. I think different types of animal like a cat or a rabbit could work, with their textures and ears differentiating them, along with making them colourful as they’re childrens toys.


Comments